Lotion Potion

Sorry, I know I haven’t posted for a while. I decided to take a bit of time after grandma 20160125_104236[1]passed to remember her…plus I’ve had this awful cough for 5 weeks now so I haven’t been feeling the greatest. We’re not positive what this is but it’s definitely some kind of chest infection. I was put on antibiotics and given some kind of cough syrup and I think it’s slowly starting to go away. Everyone else in the house is coughing though, too. I can hear all three girls coughing at night and even Matthew is not feeling well now. Children under 6 really aren’t supposed to have cough medicine so I got them some Stodal honey cough syrup. It’s a homeopathic medicine with honey that’s really popular in the east. It seems to help their coughs so I am happy with it. I’ve also had my diffuser on constantly with Thieves oil to help!

Anyway, I guess I’ll start with what I wanted to talk about today. In the past I’ve talked about how awesome coconut oil is, and I’m sure this will not be the last time! I’ll be sharing a quick lotion recipe that is good for really dry skin and some lotions I love. First I’ll just share how I came about deciding to use it.

I’m sure that many of you suffer with eczema brought on by our harsh Saskatchewan winters. The dry air and cold winds just suck all the moisture out of our skin. All three of our girls have had it pretty bad on their faces; it doesn’t help that they’ve also had runny noses because of the cold, too. They always lick their lips and the skin around their lips, which also contributes to it. (I’ll add a picture sometime if it happens again, but we’ve been managing it pretty well so it hasn’t been bad in a while.) I mostly suffer with super dry hands in the winter time. If I don’t put lotion on many times a day, they will actually crack and bleed. It’s been like that as long as I can remember.

Anyway, they were all complaining that their faces hurt; and it really looked sore. They had red blotches all around their mouths and up their cheeks and their hands were just 20160125_103912
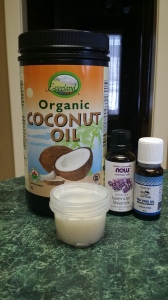
dried out as well. I could’ve went to the doctor and gotten a medicated lotion, but I wanted to try something a little simpler first so I found a recipe that only uses 3-4 ingredients. Here is the recipe that I use.

The Best Lotion For Dry Skin

  • 1/2 cup coconut oil
  • 1/2 cup shea butter
  • 10 drops lavender essential oil
  • 10 drops tea tree oil

Just whip it all together and you’re good to go! The longer you whip it, the fluffier it will get. Not everyone likes the smell of those two mixed together, but it really works. You can leave out the shea butter if you don’t have any. Coconut oil itself will work great!

I’ve never had a problem with dry skin on my face (in fact I have an oily T-zone so I’ve always been scared to put lotions on my face) but I put this on my face every morning after I shower and every night before bed and my skin feels amazing! I love how soft and healthy it makes my skin feel. Lavender and tea tree oil are both antibacterial so it’s just a great combination. I like to put this on my feet at 20160125_103528
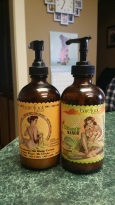
night, too and I even put it on my tattoo to brighten it up.

I know I’ve said this before, but I love the Barefoot Venus lotions. I use these for my hands every single day. They have many great scents and they use natural ingredients, which I love! My favorite one is this macadamia oil body cream which is scented with pink grapefruit, bergamot and peppermint oils. I also really like the Hunny Mango body cream because the smell reminds me of Hawaii.

At night time I like to use the 20160125_103542
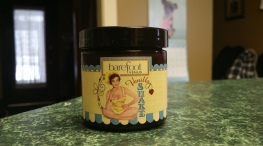
instant hand repair butters. You can get them in any scent that the creams come in. Right now I have the Vanilla Shake, but I’m not a huge vanilla fan and I prefer the citrus scents. I like these at night because they are heavier and don’t soak in as quickly so they work all night and in the morning my hands are nice
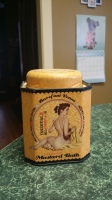
 20160125_103512and soft.

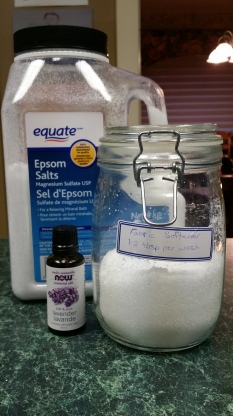
The only place in town I’ve found these at is Pharmasave. They always have some testers there so you can try or smell them to which one you like. I like the Lilly Pilly and Gingerly scents as well but haven’t tried them yet as one bottle lasts quite a while. I have tried the Gingerly hand soap, though, and quite enjoyed it. I also love their mustard bath because it smells amazing and makes you feel really relaxed.

That’s all for now! I hope you enjoy the dry skin lotion, I know we have. I keep a jar upstairs for bedtime and one in the diaper bag for travel. The girls ask for it every single night because they know it works. They want me to put it on every singly “owie” they get because they think it fixes everything. I also hope you enjoy the lotion suggestions. I’ve had incredibly dry hands since I was a child (ask my mom!) and this stuff has definitely worked the best.

Finally, brothers and sisters, whatever is true, whatever is noble, whatever is right, whatever is pure, whatever is lovely, whatever is admirable—if anything is excellent or praiseworthy—think about such things.

Philippians 4:8 NIV


Elsie

I’m sitting here trying to rack my brain on what to write and how to write this. At 5:27 pm20141111_140358.jpg 
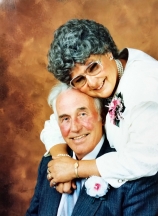
on January 18, 2016 my dad called me and told me that my grandma had passed away. For a few moments I had no words. Tears filled my eyes and I felt like I couldn’t breathe. My grandma wasn’t here anymore…. She wasn’t in her little house watching the weather channel while drinking tea, she wasn’t dusting her doll collection, she wasn’t about to call me to check in and see how the weather was in her old town or asking to fill her in on how the family’s doing. She was gone…leaving behind 2 of her 3 children, 10 grandchildren, and 13 great-grandchildren.

When I think about my grandma, I always think about her in her old home…the one she 20160118_215100
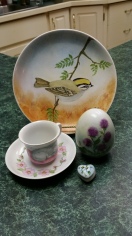
moved in to after my grandpa passed away and she moved to the city. My grandma was an amazing artist. Her medium was porcelain. She painted dolls, plates, china cups, tiles, hot plates, tea pots, etc. They were very, very good! Her kitchen had a shelf that spanned two walls, plus another in the living room, on which she displayed her plates. She had more china cabinets than I can really remember, all full of her treasures. The ones on the main floor were for her smaller pieces, like smaller dolls, figurines, etc. The basement was full of her porcelain dolls. She had collectors dolls, like the princess Diana wedding set and the quintets, and an assortment of ones she’d made herself that were all beautiful. She also collected beanie babies because she figured they’d be MMS82.jpgworth something someday.

My grandma was a very unique lady and here are some things that will always make me think of her: the pink chesterfields in her living room, the giant ornate mirror, the rocking armchair in her kitchen, taking panorama pictures, floral shirts and skirts with slippers, the smell of mothballs, her sunroom, and Sunny D are just a few. We would always fight over who got to sit in that big armchair! Otherwise you had to sit on one of the dining chairs while everyone visited. When we were little, she had a closet in the hallway that had some toys in it and as a kid I remember going straight to the closet to try and grab the best toys before my siblings got there. I also remember getting freaked out at the porcelain mannequin sitting at the end of the hallway next to the mirror.

My grandma was very thoughtful in her own way. She would find pamphlets, articles, or newspaper clippings that she thought contained very useful information that she wanted to pass on to us. I still remember getting slightly traumatized at age 16 when she gave me a pamphlet on how not to get traveler’s diarrhea. Or the time she told me never to shave my legs because eventually all the hair would fall out anyways. She loved her family deeply, even if we didn’t always understand the ways she showed it. She thought about us all constantly.

20160118_215009

Left: A rhino (Grimace) she gave Matthew after he commented on it. Right: Scorch, my favorite stuffie growing up.

I guess my grandpa was the conversationalist of the pair; that’s what I’m told anyways, as he passed when I was just one year old. But she loved having visitors. She liked to putter around making sure people were fed and watered and had everything they needed. She had her special chair at the table that everyone knew was grandma’s chair. We often had to tell her to just sit and eat with us because she was so busy checking on everything and everyone. I don’t think I’ll ever forget her carrot jello (orange jello with shaved carrots inside) or her cupboard full of boxes and boxes of teas.

You never knew when she was going to give you a gift. You could go years without a birthday or Christmas present, but you’d go for a random visit and she’d send you home with a stuffed animal (that turns out to be your favorite for many years) or just some clothes that she wore as a young lady and thought you might like. Or one time we convinced her that she needed to get another VHS movie because basically all she had was The Adventures of Milo and Otis and we’d seen it about a million times. So we went to the store and picked out Atlantis and watched that one a million times, too.

She was always there for us when we needed her. She was basically the sole carer for my uncle when he lived in the hospital and couldn’t take care of himselfIMG-20110212-00080 
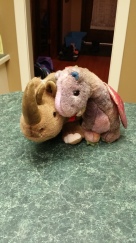
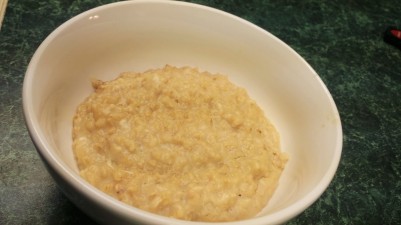
anymore. She visited him almost daily and took care of anything he needed. She always had a room ready for anyone. The hide-a-bed was not always the comfiest, but it was always perfectly made up when we went to visit…right next to the Christmas tree that stayed up all year with a bag on it. She would always have a bed waiting for me if I needed to stay for a weekend while I was working at camp or just wanted to come visit friends. When my cousin needed a place to live for a while, she offered her downstairs bedroom to him. When it was my turn to need somewhere to live, she didn’t even hesitate and even made me porridge every morning and gave me as many canned crab apples as I wanted. I was staying there when I got the call about Matthew having cancer and I was living there when he proposed.


1950 John & Elsie wedding (color)I’ll never forget my grandma. She was a very special and hardworking woman and she always supported me. There are so many memories I have of her, it was hard to just pick a few. Yes she’s gone, but we’ll never forget the time we spent with her and how special she was to us. I have already shed tears for her and I will shed more as more memories come forward; but I will always smile when I think of the times we spent together.

We all have our own stories to share of times with her. If you have any of her or my grandpa please share them in the comments, I’d love to read all of them!


May the God of hope fill you with all joy and peace as you trust in him, so that you may overflow with hope by the power of the Holy Spirit.       Romans 15:13


Meat You in the Middle

I don’t have to tell you guys how important beef is on the prairies! We raise it, we sell it, we eat it…a lot. Everybody has their favorite beef infused dishes and I’m no exception. I’ll just quickly be sharing a couple recipes that I have tried many times and they’ve always come out great!

This first dish is one that I’ve been using for many years. As a teenager I did a lot of cooking for the family and let me tell you, it can be difficult to find a good recipe for 7 people…especially one that everyone likes. We had a ton of Company’s Coming cookbooks and this one hails from the Casseroles book.

Beef and Corn Bake

Ingredients

20160117_171512

Ok so I’m not so neat at pouring stuff in…still tastes good!

  • 2 lbs ground beef
  • 1 medium onion
  • 1/4 cup cooking oil*
  • 12 oz kernel corn**
  • 2 – 10 oz condensed tomato soup
  • 1 tsp salt
  • 1/2 tsp pepper
  • 1 tbsp ketchup
  • 2 cups cooked noodles***
  • 1 cup grated cheddar cheese

Directions

  • Put ground beef, onion, and oil in frying pan. Stir to break up meat as it browns. Drain off fat. Discard. Put meat mixture into large bowl.
  • Put corn, soup, salt, pepper, and ketchup into same bowl. Stir to mix together with meat.
  • Prepare noodles according to package directions. Drain. Measure. Combine with all ingredients in bowl. Pour into 3-quart casserole.
  • Sprinkle grated cheese over top. Cover. Bake in 350ºF oven for 45 minutes. Remove cover and continue to bake until cheese is melted and bubbly. Serves 6-8.

*I have never used this much oil. I usually just put a thin layer on the bottom. You can use any kind of cooking oil.

**This recipe is amazing with corn but some frozen mixed vegetables work great too.

***I like to use elbow macaroni!

The next recipe I’d like to share is this one for sweet and sour meatballs. I’ve made this one a few times and it just tastes great. Even Matthew loves this recipe and asks me to make it all the time! In fact, I just made 3 meals worth of meatballs yesterday and put them in the freezer. They are really great served over rice.

The Best Sweet and Sour Meatballs

Ingredients 

20160117_171318

Mmm…meatballs!

  • 1 pound ground beef
  • 1 egg
  • 1/4 cup dry bread crumbs
  • 1 onion, diced
  • 1 cup packed brown sugar
  • 3 tablespoons all-purpose flour
  • 1 1/2 cups water
  • 1/4 cup distilled white vinegar
  • 3 tablespoons soy sauce

Directions

  • In a medium bowl, combine the ground beef, egg, bread crumbs and onion. Mix thoroughly and shape into golf ball-sized balls.
  • In a large skillet over medium heat, gently brown the meatballs and set aside.
  • In a large saucepan, combine the brown sugar, flour, water, white vinegar and soy sauce. Mix thoroughly. Add meatballs and bring to a boil. Reduce heat and simmer, stirring often, for 30 minutes.

Now if you don’t like sweet and sour or you want a different sauce, just do the first two bullets and then add them to whatever sauce you want. They are also great with spaghetti!

I hope you like these recipes as much as we do! The kids always gobble both of these dishes up and Matthew tells me all the time that he wishes he didn’t have to share the meatballs and could eat them all.

The Weak and the Strong – Romans 14

Whoever regards one day as special does so to the Lord. Whoever eats meat does so to the Lord, for they give thanks to God; and whoever abstains does so to the Lord and gives thanks to God.   Romans 14:5-6


Alot of Oatmeal

Today I’m just going to be sharing a short post as it’s pretty busy this weekend! My brother is visiting for a few days and we are going to a special little 3 year old’s birthday party later on.

I woke up this morning wondering what I should make for breakfast. I pondered cereal, toast, bagels, eggs…but all of a sudden I got a massive hankering for butterscotch oatmeal. It is seriously the best oatmeal I’ve ever had! Here is the recipe for my favorite oatmeal. 20160116_092230

Ingredients

  • 1 egg, beaten
  • 1 3/4 cups milk
  • 1/2 cup packed brown sugar
  • 1 cup rolled oats
  • 2 tablespoons butter

Directions

  • In a saucepan over medium heat, whisk together the egg, milk and brown sugar. Mix in the oats. When the oatmeal begins to boil, cook and stir until thick. Remove from the heat, and stir in butter until melted. Serve immediately.

If you’re a tea drinker, like me, then another great way to eat oatmeal is to use tea instead of water. Just make your favorite tea and pour it over the oats and let them cook! It tastes amazing and, if you’ve made enough, then you have leftover tea to drink!

I hope you enjoy these recipes as much as I do!

Because of the Lord’s great love we are not consumed, for his compassions never fail. They are new every morning; great is your faithfulness. Lamentations 3:22-23 

All Sorrows Are Less With Bread

First of all, I am so proud of my little girl! She lost 2 teeth yesterday! This is my first time 20160113_214230
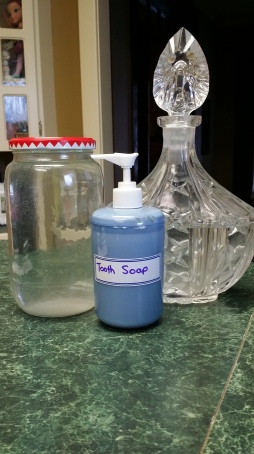
handling lost teeth and I was totally unprepared. I had to quickly run to the store and get some “tooth fairy” stuff and then try and get it done before she went to bed. She was pretty excited to lay her teeth in the tooth fairy bed and then see that they were replaced with prizes this morning! I have a feeling that she’ll be talking about this until her next tooth falls out.

Bread

So today I’m going to do something a little different than other posts. Today is bread making day! I love bread making day. The house smells amazing and it’s actually pretty fun to make your own bread. I’ve only been doing it for a couple months, but I hope I can keep this up!

I have always loved baking. I mean, cooking is alright but nothing compares with baking. I’m not sure what it is. I love measuring out the flour and sugar, cracking the eggs, the smell of the kitchen, and (of course) licking the bowl after! Although I wouldn’t want to lick the bread bowl afterwards, it’s still baking and it’s still fun. Growing up as the eldest child in a house of 7 people, I had a lot of chances to cook and bake. Instead of doing just a batch of cookies, I’d have to do at least 3. Of course, we’d try to freeze some for lunches 20160114_093742
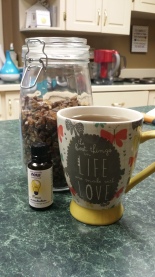
and stuff…but they still didn’t last super long.

I’ve always been drawn to the kitchen though. Whenever chores were divvied, I was often on kitchen duty. Even now the kitchen feels like center of my house, and I spend a lot of time in it. As I write this post I’m sitting at my kitchen counter drinking some chamomile tea enjoying the focus concentration blend in my diffuser.  It doesn’t help that I have an awesome kitchen! I love my wrap around counter…although I wish these stools were a bit softer. I like to fill my kitchen (and house) with pictures of the people I love and my “china cabinet” is full of my treasures and memories. It’s just an overall calming place for me.

Anyway, back to bread! Here is the recipe that I love using. I have used other recipes, but this one always turns out great for me.

_______________________________________________

Traditional White Bread

Ingredients

  • 2 (.25 ounce) packages active dry yeast20160114_103650
  • 3 tablespoons white sugar
  • 2 1/2 cups warm water (110 degrees F/45 degrees C)
  • 3 tablespoons lard, softened*
  • 1 tablespoon salt**
  • 6 1/2 cups bread flour***

Directions

  • In a large bowl, dissolve yeast and sugar in warm water. Stir in lard, salt and two cups of the flour. Stir in the remaining flour, 20160114_114136
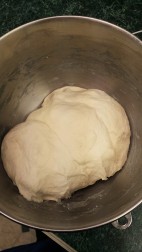
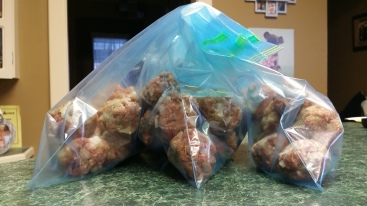
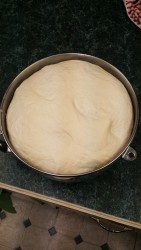
1/2 cup at a time, beating well after each addition. When the dough has pulled together, turn it out onto a lightly floured surface and knead until smooth and elastic, about 8 minutes.
  • Lightly oil a large bowl, place the dough in the bowl and turn to coat with oil. Cover with a damp cloth and let rise in a warm place until doubled in volume, about 1 hour.

    20160114_141737

    Mmm fresh!

  • Deflate the dough and turn it out onto a lightly floured surface. Divide the dough into two equal pieces and form into loaves. Place the loaves into two lightly greased 9×5 inch loaf pans. Cover
    the loaves with a damp cloth and let rise until doubled in volume, about 40 minutes.
  • Preheat oven to 425 degrees F (220 degrees C).
  • Bake at 375 degrees F (190 degrees C) for about 30 minutes or until the top is golden
    brown and the bottom of the loaf sounds hollow when tapped.

_______________________________________________________________

*I usually substitute for margarine. I’ve also tried coconut oil and it turned out well but 20151225_201240
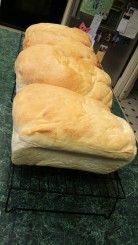
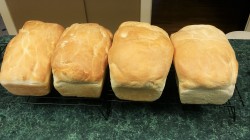
just didn’t rise quite as much when baked.

**I always follow one of the comment suggestions and use less salt. Usually about 1 tsp – 1/2 tbsp.

***I like to just use all-purpose flour. I have used whole wheat flour and it worked well, but the bread was a little drier than with the all-purpose flour.

I often knead my bread by hand because it’s fun and therapeutic. But sometimes I use my awesome KitchenAid mixer that I got for Christmas! I’ve been wanting one for so long and I’m pretty pumped that I have one now!

Butter

I think I’d really like to try making my own butter, too. There is nothing better than a slice of homemade bread, fresh out of the oven, with butter on it. Yum! This recipe looks pretty good. If I ever get my hands on some heavy whipping cream I’ll definitely be trying it. Here is another super easy one.

_________________________________________________________________

Blender Butter

Ingredients

  • 1 cup heavy cream
  • ice water

Yep. That’s it. Oh yeah…and a blender (at least for this version.) Oh, and something to

IMG_5627

Old picture of my “china cabinet”

strain the butter/buttermilk. But THAT’S it.

Directions:

  • You want to start with the cream at room temperature…it will go a lot faster that way. Pour the cream into the blender.
  • Add salt to taste if desired. I used about a 1/4 teaspoon.
  • Blend on medium-high speed for 3-5 (or more) minutes. How long this step takes will be highly dependent on your blender. It could take up to 10 minutes in an older blender.
  • Just keep an eye on it and when the butter starts to separate into butter and buttermilk stop the blender.
  • Let the cream sit for a minute or two as the butter rises to the top. Pour the buttermilk off into another container.
  • Rise until water runs clear, or about 6 or 7 times. (Add cold water to blender and pulse for a few seconds, then rinse)
  •  Spoon butter into a strainer to drain. At this point you can pack your butter into molds or form it into a log like I did. Stick it in the refrigerator to chill.

_________________________________________________________________

Sounds pretty good right?

20160114_141717

I made two batches so I can freeze some!

Ok, I think I’ve spent enough typing for now. Time to get making this bread! I hope you all have a great day and remember, there is always hope.

Then Jesus declared, “I am the bread of life. Whoever comes to me will never go hungry, and whoever believes in me will never be thirsty. John 6:35

“All sorrows are less with bread.”
Miguel de Cervantes, Spanish author. (1547-1616)

Laundry Day!

As you’ve probably gathered from the title, today’s post will be about laundry. I know, I know, it’s not something we all like to think about. Especially when we have kids who never like to wear their clothes twice! My washer and dryer is in the basement of our two-story house and the bedrooms on on the top floor. It’s a lot of stairs to drag that huge hamper up and down. I try to wait until the hamper is overflowing and the girls are on their last pair of undies before doing it. Then, with a sigh, I awkwardly carry the hamper down to the basement. Did I mention that our basement staircase is weirdly thin too?? Thank goodness Matthew does our laundry and I do the kids’s, or I’d probably be doing laundry every single day! At least I’d be in good shape then :p.

Anyway, got off topic a bit there. Laundry. Specifically laundry soap and detergent. Here is a nice chart that explains what some of those nasty, irritant ingredients are in our laundry detergent and what they can actually do to us. Some people are more sensitive than others to detergents and can break out in rashes. This is also an interesting read and gives you a recipe and some tips for in the laundry room. Ugh why must they put this stuff in our products! If you’re only going to read one of these though, this is the one. Wow…just wow.

With people going greener and realizing what kinds of harsh chemicals are in their home and beauty products, there are a lot of better products out there to choose from. I haven’t tried them yet because I found a homemade one that works well for me. Just make sure you read the label before buying! Even some labels that say “green” try to sneak some nasty stuff in there so just know what you want to avoid and try to find a company you can trust.

20160113_092128

I’m making another batch as I write this! Ps. The tea tree soap smells awesome…I kind of want to get a bunch of tea tree bars just to use, too.

Here is the recipe I’ve been using for months in my washer:

  • 1 bar of soap (Castile soap also works well)*
  • 1 cup washing soda
  • 1 cup Borax
  • Grate the entire bar of soap.

Directions:

  • Add grated soap to blender with 1 cup of either the washing soda or the borax. Basically you just
    20160113_093926

    Ready for the blender! 1 cup of Borax and 1 bar of soap, grated.

    want to blend it until the pieces are cute more finely so that the soap dissolves easily in the washing machine.

  • Add the blended mixture to a bowl and mix in the remaining 1 cup of either washing soda or Borax. Use a spoon to mix it thoroughly and break up any large chunks.
  • Use 1 heaped tbsp per load. Use 2 tbsp for extra dirty load.

*I use Dr Bronners pure-castile soap bars. The come in different scents and unscented. I wasn’t a fan of the almond scent, but I liked the lavender and I’m trying tea tree this time.

I also like to add a bit of scent booster to the jar to make it smell awesome. You can leave it out though if you want, too. Ps. The lavender one smells awesome. Plus, the measurements make it super easy to double or triple! (If your arm can handle all the grating!)


Fabric Softeners

Ok, next let’s talk fabric softeners and dryer sheets. Here is a bit of information about them to get us started. Hmm…I don’t like those ingredients. If that wasn’t enough information, how about this? I don’t know about you, but I feel like I need to get a huge box of baking soda after reading those. Still not enough? How about nowNowNOW?20160113_092326

Here is the recipe I use for fabric softener at the moment: 

  • 4 Cups Epsom Salts
  • 40 drops Essential Oils (lavender and tea tree are great choices)
  • Mix them together and you are done.

Directions

  • Use 1-2 tbsp per wash load.

And that’s it! So easy you’ll wonder why you haven’t always been doing this! I don’t even put dryer sheets in my dryer anymore. I love the smell of my clothes when they come out; and to be honest, I didn’t even notice any change when I switched to this detergent or softener. Usually Matthew is wary to use my homemade stuff, but he does actually use these and has never said anything bad about them. He even likes it when I make more! If that doesn’t make you switch, I don’t know what will!

Wash away all my iniquity
    and cleanse me from my sin.                                                                                                                                               Psalm 51:2


Down The Hatch

For my second post I’d like to talk about something we use every single day (some more than others) and we don’t always think about how we treat it. That’s right, our mouths. We use our favorite toothpastes and mouthwashes without really thinking about it. Now, most ingredients in toothpaste are pretty harmless in small doses. However, most do contain some of those bad ingredients that I talked about in my first post (yes there’s formaldehyde in some toothpastes too!), as well as fluoride and various dyes. When I was researching mouthwashes, I was surprised at how many sites showed how some of them can actually stain your teeth with prolonged use. Hmm…I thought mouthwash was supposed to clean your mouth? Here is some info on mouthwash.

Now I’m not saying you need to change your toothpaste. If you’re happy with it then that’s great! I still sometimes use regular toothpaste too, although I do check the ingredients before buying. I’m just going to offer a few alternate choices if you want to try them.

I’ve been thinking a while about making my own toothpaste, but there are so many different recipes out there I had no idea where to start. I I want a toothpaste, tooth powder, or tooth soap? Finally, I decided to start with a tooth soap since I already had all the ingredients on hand. I’ve only used it a few times so far, but I like it. It is foamy and has a great taste! Plus I can put it in a cute little soap dispenser…which is kind of fun. I just got a cheap soap dispenser to start with, in case I didn’t like it. I’ll keep trying it and, if it continues to please, then I’ll get a nicer looking one. My favorite part of this tooth soap is that it contains coconut oil. If you haven’t gathered yet, I love coconut oil! I put it on my face, in my food, and now on my toothbrush!

Here is how to make your own toothsoap20160112_124230[1]

  • 2 Tbsp boiled water
  • 4 teaspoons Dr. Bronner’s unscented or peppermint liquid castile soap (I used peppermint)*
  • 1/2 cup melted coconut oil (make sure to use a double boiler)
  • 1 to 2 tsp Slim Sweet, Xylitol, or Stevia (I used 2 tsp of Stevia because I’d read about some people using less and it not being sweet enough)
  • 20-30 drops peppermint or spearmint essential oils

Directions:

  • In a small saucepan, boil a small amount of water (like 1/4 to 1/2 cup–doesn’t have to be exact, as you only need a couple of tablespoons).  Add 2 tablespoons of the boiled water to a food processor or blender.
  • Measure the coconut oil. Add the coconut oil to the blender. Add the 2 tsp sweetener. Add the 4 tsp castile soap.
  • And lastly, add the essential oil. (Some people mentioned using closer to 30 to have a good, strong flavor)
  • Turn on the blender and blend until frothy.

Now, I read about how abrasives are good for your teeth and I also read about how some people just brush with baking soda so I also added a teaspoon of baking soda in to the mix. Baking soda is a great way to freshen your breath and remove plaque. Also, I’m sure you could make any flavor if you used the unscented soap and used a bit extra essential oil.

You should definitely shake this before using, as the coconut oil can pool at the bottom.

*I love the ingredients in the Dr. Bronner’s soaps. They are all on their website if you want to check them out.

I think that I’d also try this toothpaste recipe too from the same website. This would be more solid than the tooth soap so you’d want to keep it in a jar, rather than a dispenser.

  • 1/4 cup coconut oil ct
  • 5 tablespoons baking soda
  • 10-20 drops peppermint essential oil (or any essential oil you prefer)
  • xylitol powder, optional
  • optional: you can also add Bentonite Clay and Black Walnut hull powder

Directions:

  1. Melt the coconut oil, if necessary.
  2. Add baking soda to the coconut oil and stir with a fork until it forms a paste.
  3. Add the peppermint essential oil and optional xylitol powder. I used closer to 20 drops of essential oil, and about 1/2 tablespoon of xylitol powder (I used granulated xylitol and ground it in the coffee grinder to make a powder.).
  4. Mix all together and store in a covered glass jar.
Notes: I just dip my toothbrush in this (each family member would have their own jar of toothpaste). If you prefer, you could also keep a popsicle stick or a small measuring spoon near the jar and use this to scoop it out. You can also find tubes that might work to make a toothpaste that would squirt. I haven’t tried this yet.


Here is a great mouthwash recipe that I use exclusively now:

  • 2 cups distilled water 20160112_124314[1]
  • 1 Tbsp baking soda
  • 1 tsp unrefined sea salt
  • liquid Stevia/Xylitol to taste, about 15 drops
  • your choice of essential
  • a glass bottle

Directions:

  • Mix everything together in your glass bottle and give it a good shake.
  • After brushing, swish around a tablespoon or so for 30 seconds, then spit. Do this twice daily.
  • You might need to give it a shake before each time you use it, as the baking soda will settle to the bottom.

Let’s take a look at those ingredients in the mouthwash.

Baking Soda a.k.a. sodium bicarbonate: Baking soda can help combat halitosis (i.e. dragon breath)! Halitosis can be caused by residue from acidic foods. Baking soda (since it’s a base) helps balance out the acid, thereby preventing the dragon breath! Baking soda can also help prevent gum disease by inhibiting buildup of nasty plaque (source)! And finally, baking soda can also help keep those pearly whites extra white by removing stains from the teeth!

Sea Salt: Due to the high mineral content in unrefined sea salt, it can actually help remineralize your teeth and keep them strong! In addition, if you have any sores or ulcers in your mouth, sea salt is great for taking away the inflammation. It can also aid in reducing inflammation in the gum tissue, such as that seen with gingivitis.

Liquid Stevia/Xylitol: Purely for taste. I don’t know about you, but I like my mouthwash a little sweet.

Essential Oils: Here is where you can get a little creative. If you really love a nice minty fresh mouthwash, then stick with peppermint or spearmint. Or perhaps you’re a bit of a rebel and you love cinnamon. That’s cool too. But if you’re feeling like you want to get really wild and crazy, go for a Thieves blend! The essential oils in Thieves (cinnamon, lemon, clove, eucalyptus and rosemary) are a serious germ-fighting powerhouse to add to your mouthwash.  More info on thieves

20160112_104357

As you can see, you need to shake the mouthwash each time because the baking soda and salt settles to the bottom.


I hope that these two recipes work as well for you as they have for me! I’ll let you know how the tooth soap works after prolonged use and we’ll see if I stick to it or try something else. The fun thing about making your own products is you can experiment with it all the time! Plus you can always find cute little containers to put them in. You can see in the picture that I’ve tried a regular pickle jar, as well as a fancy decanter I found at a garage sale last year. Have fun with it!

 Create in me a pure heart, O God,
    and renew a steadfast spirit within me.                                    Psalm 51:10 


First Things First

So I’ve been trying a bunch of new all-natural home and beauty products recently and I thought, “Hey, maybe some other people I know wanna try them too!” So here we are. I’ll share a few things that I’ve tried and some new things I’ve found out. Maybe I’ll share some crafty projects or other hobbies as well. Or maybe I’ll just rant. I really never know what’s going to come out of my head!

For those of you who don’t know me very well yet, my name is Melissa. I’ve been married to my wonderful husband, Matthew, for 4.5 years already. We started dating in December of 2007 and were married by June of 2011. We’ve been through more than our share of tough times, but God has always provided the things we need and some extra (maybe I’ll elaborate another day). We started a crazy new journey this past April when we were finally licensed foster parents! We’ve had 5 kids so far (3 of which are still with us at the moment) between the ages of 2 months and 5 years. It’s been crazy, stressful, hectic, frustrating, and wonderful.

Anyways, let’s get to it. I guess for this first post I’ll start with just listing a few of my staples for any of the home and beauty products I make. I like to keep these around at all times because you can use them in so many things!20160112_132446[1]

  • Coconut Oil
  • Beeswax
  • Apple Cider Vinegar
  • Peppermint Essential Oil
  • Lavender Essential Oil
  • Thieves Essential Oil
  • Tea Tree Oil
  • Baking Soda
  • Liquid Stevia (or any liquid sweetener)
  • Dr Bronners Magic Soap
  • Containers! (Jars, balm containers, spray bottles, etc)

Another thing that is essential is a double boiler. You can buy one but it’s much easier to just make one. All you need is a small pot and a heat-proof bowl (I use a stainless steel one). If you don’t know what a double boiler is then check out this link.


A few brands of things that I like to use are:

  • Barefoot Venus – They make awesome natural lotions and bath powder.
  • Jason – My very favorite natural shampoo and conditioner! Also they make good body and hand soaps.
  • NOW Essential Oils – This is what our local store mostly sells but any essential oil brand would be good as long as it’s 100% pure.
  • Dr Bronners Magic Soap – This is a natural, fair trade soap that you can use for so many things! From hand cleaner to toothpaste to floor cleaner…it cleans pretty much anything if you know how to use it.

The reason that I started looking in to the all natural home and beauty products was not at all an interesting story haha. You know how sometimes you start reading stuff on the internet and you end up going down the rabbit hole and it’s like an hour later and you aren’t anywhere close to where you started? I have no idea where I started, but I ended up on a page talking about ingredients in shampoo and other beauty products.

Here are a couple websites if you’d like to read for yourself:

I don’t know if you stopped to check those out, but when I read these the ingredient DMDM Hydantoin probably freaked me out the most. Did you see that it’s a fancy name for FORMALDEHYDE?!  As in dead bodies and frogs you dissect in biology class…ew. Also, heart
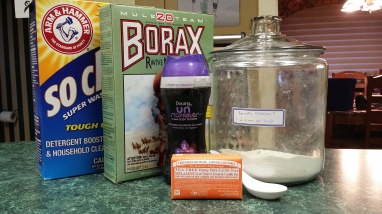
some of those ingredients are linked to cancer. If you know about Matthew’s history with cancer then you know that was a huge red flag for me, too. So I went and looked at my shampoo and stuff and sure enough all of those ingredient were in them!

Anyway, after I read all that I started researching simple ways I can change or make things to replace those products. Of course the next day I went to our local Nutters to get new shampoo and conditioner (and threw out the other stuff). I decided to try the Jason brand and 20150228_101442I’ve never looked back! It has way less of those nasty ingredients than other shampoos. Plus, it has made my hair softer, lighter, and thicker. Even my hair dresser noticed the next time I saw her! I’d suggest trying out a few different kinds before you decide which of the Jason shampoos you like. I prefer the sea kelp, whereas my mom likes the biotin and my sister likes the jojoba. 

Next I looked up a few blogs written by stay-at-home moms* who make their own beauty products. I’d never used essential oils before, but they all talked so much about them that I did a little more research about them. If you haven’t tried using essential oils then you should run to the store NOW and get some! They have so many health benefits and they smell amazing! (Depending on which scent you get lol.) If I had to pick a few oils to start with, I’d pick peppermint, lavender, tea tree, and thieves for the most basic products. As you experiment you can expand to more. These 4 oils can help anything from burns to bad breath, lice, colds/flu, eczema and more! Once I was making 20151111_115200waffles and steam came out and hit the top of my ring finger and pushed the skin up. It was just all bunched up in one spot…really weird looking. Anyway, I soaked it in a bowl of ice cubes, water, and lavender essential oil for a while and I don’t even have a scar now! Yes it stung for a while, but then I put a bandaid on it and it didn’t even hurt after a while. I swear it was the lavender because I’ve had burns before and they took a lot longer to heal and they all hurt for a lot longer after.

Also, they are great to add to products to make any smell you like. If you read the above 20160113_095650
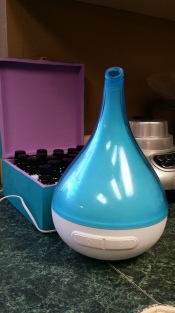
links, you know that “fragrance” is an awful ingredient in many products (basically a hundred chemicals mixed together). You can’t always get away from it, even in natural products you buy…but you can certainly avoid it when you make your own!

Also, if you like candles and smelling things you should definitely get a diffuser. It works as a mini humidifier, you can add whatever smell (essential oil) you like and change it as often you want, and the oils that are diffused in to the air have natural health benefits (anything from cleaning the air to calming for sleep and even healing).

*Here are some of my favorite mom blogs: The Humbled HomemakerModern Hippie Housewife, and Scratch Mommy. I also really love Everyday Roots. They all have a lot of great DIY’s for the body and home.

Once I started looking up recipes for lotions, lip balms, hair detanglers, etc. I found a few common ingredients. Coconut oil and beeswax were in pretty much every one. I found both of these at our local Nutters as well. If you don’t know much about coconut oil please check out this link (seriously, check out that link!). The beeswax is for lotions and balms that you don’t want too soft or runny.

Another good thing about making some of these things yourself is that it’s not nearly as harmful for little fingers that like to get in to things! Which is great for me with kids coming and going all the time.

I hope these lists and info help you start your journey! I’ll be sharing some of my favorite products I’ve made and continue to use, as well as new ones that I find and we’ll see together if they work or not. I am by no means an expert, but together we can figure this out!

***I’ve added a lot of links to information pages so you can make your own judgments about what’s in your products. I hope they’ve helped!***

Be joyful in hope, patient in affliction, and faithful in prayer. Romans 12:12